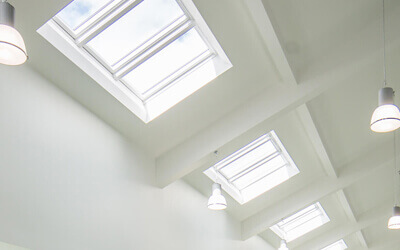
Installing roof windows can be a fantastic way of transforming space, flooding it with natural light. They are regularly installed across a multitude of projects on a day to day basis from home extension to grand churches. Poor or incorrect installation of roof windows can lead to hidden and even disastrous consequences, which are always suffered by the occupier. There are two major consequences of improper installation, namely cold or wet roof windows. This blog aims to act as a guide of best practice to steer clear form any difficulties.
Before the installation of the roof windows, it is important to consider the following when positioning the windows within the roof.
– The use of the room
– Building regulation requirements and/or restrictions
– Ensuring a clear view through the window when standing or seating
– Comfortable opening and closing of the window
Roof Type/ Construction
As you are cutting a hole within the building fabric to fit the roof windows, it is always important to understand the construction and finish, as rafters may have to be cut with trimmers properly installed in order to support the weight of the roof window.
Before the installation of any roof window, check the manufacturer’s instructions provided as it may differ depending on flashing kits or manufacturers.
Roof Finish
The roofing finish is also a factor of consideration as there are different flashing types to suit different roofing types, for example slate and plain tile. These flashing types will differ to allow the water to drain correctly away from the window, ensuring watertight installation and preventing any leakage through the roof.
Roof Pitch
The pitch of the roof is an essential aspect to consider when installing roof windows, as generally, roof windows are suitable to be used in a roof with a pitch from 15’-90’. Flat roof systems and low pitch flashing kits are available for lower pitched roofs. Failure to install a roof window at the correct pitch can lead to leaking and poor performance of the product.
The brackets to fit the windows will come provided from the manufacturer, in some cases pre attached. These are normally fitted at batten level although it’s important to check installation instructions. These brackets should be used to ensure that the window sits square in the opening
 Thermal Performance
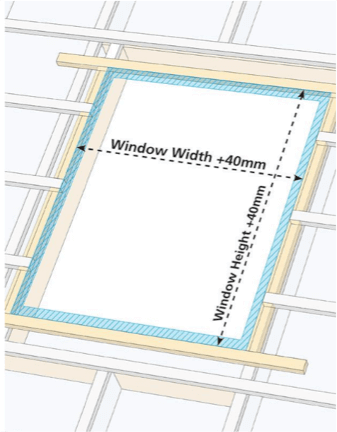
For correct installation, all roof window manufacturers will recommend that your structural opening is larger than the installed windows. A gap of minimum 20mm, up to a maximum of 30mm, should be left around the frame for an adequate amount of insulation around the window. Thermal collars are provided by manufacturers to properly insulate this gap, ensuring a thermally efficient, air tight fit that guarantees the U-Value of the window. Most manufacturers sell these thermal collars separately at an additional cost, with the result that the majority of roof windows are sold without the proprietary collar.
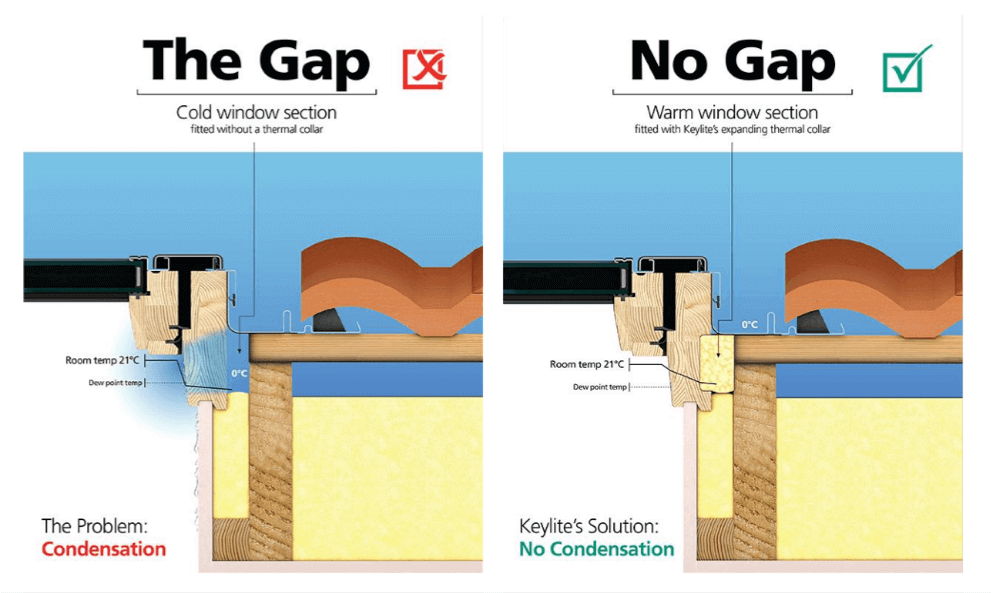
A thermal collar will minimise thermal bridging, therefore reducing heat loss around the edge of the frame once installed. Without this insulation, heat will escape around the window, often without the home owner even knowing. This not only leads to a colder room, prone to condensation forming, but also necessitates increased energy bills to heat it. Without the thermal collar to protect the window from the outside elements, the metal flashing kit is the only protection, meaning the temperature of the frame will be colder. This increases the risk of condensation forming, which can lead to mould growth, not only being visually detrimental, but also posing a health risk. Research from the BRE suggests that inclusion of a thermal collar ‘would be necessary to prevent condensation and mould growth.’ – see full report.
Splayed Lining
Splaying the top and bottom lining in the interior of the space where the roof window is installed not only allows more daylight into the space, but also increases air circulation across the inner pane, which again reduces condensation as warm air from below can keep the inner glazing at a higher temperature.
Enhanced Performance Features
Installation can also be enhanced with the use of Vapour and Felt Collars. A Vapour Collar enhances the air tightness around a roof window, as well as preventing vapour passing through the roof construction. A Felt Collar is manufactured from a flexible material that creates an impenetrable seal around the roof window and unites with the underfelt of a roof to ensure a watertight seal.
Summary
In summary, to guarantee the roof window is installed correctly, it is key to follow the manufacturer’s instructions and ensure the roof window is suitable for the pitch of the roof itself.
The roof opening must be set up with adequate support if needed, with a large enough gap for the required insulation to make it airtight. The roof window should sit on its provided brackets, more often than not at batten level, with the correct flashing kit for the roofing type installed to drain any water away. The interior lining should be splayed at the top and bottom for increased light and airflow. If all of these have been taken into consideration the roof window will be installed correctly, free of leaks and thermally efficient to prevent the forming of condensation.